Welcome to lesson Six: Lighting Outdoors! I’m so glad you’ve made it this far and you’re sticking with it! Let’s jump right in!
Lighting Outdoors
There are countless different situations you’ll find yourself in outdoors (obviously) but there are two main lighting situations I want to discuss with you today, so you can realize the lighting situation you’re in and make conscious choices on how you’ll handle that light. When dealing with natural light from the sun (or moon) you have to understand that the lighting changes as time goes by! The sun at noon will look totally different than the sun at 6pm.
Full Sun
Generally speaking full sun in my mind means anytime around 10-4pm depending on the time of year it is. By full sun I mean the sun is well on its way to being high in the sky or directly overhead of you. Do you remember what HARD LIGHT and SOFT LIGHT is? Hard light is lighting that creates dramatic shadows and soft light is lighting that does not create harsh shadows. Did you know that you can get BOTH types of lighting in full sun? Let’s discuss how you can achieve both looks with the hardest light of the day.
Creating Soft light in Full Sun Situations
I often times shoot my kids during this time of day, especially when on vacations! The best thing you can do when forced to snap photos in full sun and you DON’T want any shadows is to
find shade!

Finding shade in the heat of the day and the harsh, high light beating down.

Hiding under an awning from the harsh, bright sun.

Taking cover under a tree to hide from the harsh lighting
Simple. I know. But it’s a trick even the pro’s do. When my clients want to shoot earlier in the day, the first thing I do is find a giant tree to put my families in the shade of. The shade acts as a perfect spot to diffuse that harsh day time light and makes for nice lighting. Another trick is to hide under porches, alongside buildings…anywhere that offers a shade spot to diffuse that light and calm things down a bit.
Creating Images in All-Out Full Sun Situations
I often times think of when we are at the beach. There’s NO shade except for a little umbrella. Don’t let NO SHADE stop you from snapping away! I have snapped some of my absolute favorite images of ALL time when the sun is WAY up in the sky right above our heads and the sun is HARD LIGHT. Most people find this the most difficult to shoot in, but don’t let it scare you away. My best tip for taking photos in this type of lighting is to
set your exposure.
We learned in lesson one and two that setting exposure is as simple as holding your finger on the screen. Pick your focal point, hold your finger on it and when the small sun image pops up, slide your finger up and down to set exposure. In this lighting situation you’re going to want to lower your exposure until there are no blown out areas in the image. Remember when images have blown out areas, remember it’s a loss of actual data recorded. So setting your exposure will avoid that and capture as much detail as you’re hoping for.
Ideas to play with during full sun:
- Play with shadows and get creative using them and incorporating them into your images. Shadows themselves can be a focal point and subject in your images!
- Find interesting, colorful and beautiful spots to hide from the harsh sun! Incorporating hiding your subject in a shadow while showing the contrast of the full sun can make for stunning and interesting images! Think yin and yang! Light contrasting Dark!

Telling a story with shadows and setting exposure on her skin.

Full out sun shot. Set exposure based on her skin.

You can tell the sun is a bit lower compared to the photo above. The lighting is not quite low enough to be considered partial light. The photo above you can tell the sun was MUCH higher in the sky. Look at how long and pronounced her shadow is here almost transitioning into partial light and then into golden hour.
Partial Sun and Golden Hour
When the sun starts to make its way up or down (usually around 4-8 am and pm) your lighting changes dramatically. Shadows lengthen and disappear, the color of the light changes, skies change. It’s my favorite time of the day when we start getting that evening glow. This time of day we get a lot softer lighting situations and this is when people love shooting.
Face the Sun- Turn your subject towards the sun during golden hour (right before the sun goes down). The light is super soft and your subjects won’t have to squint their eyes and will be lit beautifully.

The sun is setting behind us to our right. You can see the soft glow on the side of her face and her limbs.

The soft lighting was coming from the sun setting behind us to the left.

Perfect example of soft sunset light hitting her face at the beach.
Backlighting- Put your subject in front of that golden light and illuminate them! Backlighting creates a warm and glowy look that you just can’t get any other time of day outside! Focus your AE/AF on your subjects face and expose to their face to not get a super dark look on your subject.

Finding light streaming through a bush at my sisters farm, I used portrait mode to capture this and edited it with my own preset called “Harvest Mood” (on sale soon!). The light illuminating through flowers adds and added element to the image.

Backlighting at my sisters farm again. Backlighting creates a glow around your subject.
Sun Flare
This is the best time of day to capture sun flare. You can literally see it happening this time of year around 5pm. The sun just pours through the tree lines as it beings its decent into night. You have to really play around with sun flare though to get a feel of how to move the light around your image. Just shifting your cell phone a smidge to the left of right could totally alter the flare. Here are some tips when playing with sun flare.

This is an example of backlighting and sun flare.
- Hide the sun behind a tree or object when the sun is too bright and let the flare peek through. By hiding it a bit, you are essentially controlling how much light you’d like to enter your image.
- Use sun flare to highlight your subject and add drama to your image.
- Remember when playing with sun flare, do just that….PLAY. Practice moving your cell phone around, walk around and find a great spot where the light just streams in.
Golden hour doesn’t last long at all. It’s important to sometimes PLAN your sunset photos. The sun dips down and is gone in a flash, so say you’re at the beach, and you notice a gorgeous spot of light streaming through after walking home from dinner, look at the time it is on your phone and plan to get back to that spot again the following day. Also, check the weather too and make sure you can match up what the time and weather was next time you want to get back there and take advantage of that gorgeous lighting. Clouds can totally screw up that look, so matching weather and timing is essential. Plan plan plan!
RECAP
- When there’s full sun, find shade! If you can’t do shade and want to shoot in the brightest part of the day, make sure to expose your image first so there are no blown out areas in your photos.
- Remember to be creative when using full sun settings. Using shade can add another creative aspect of your photography.
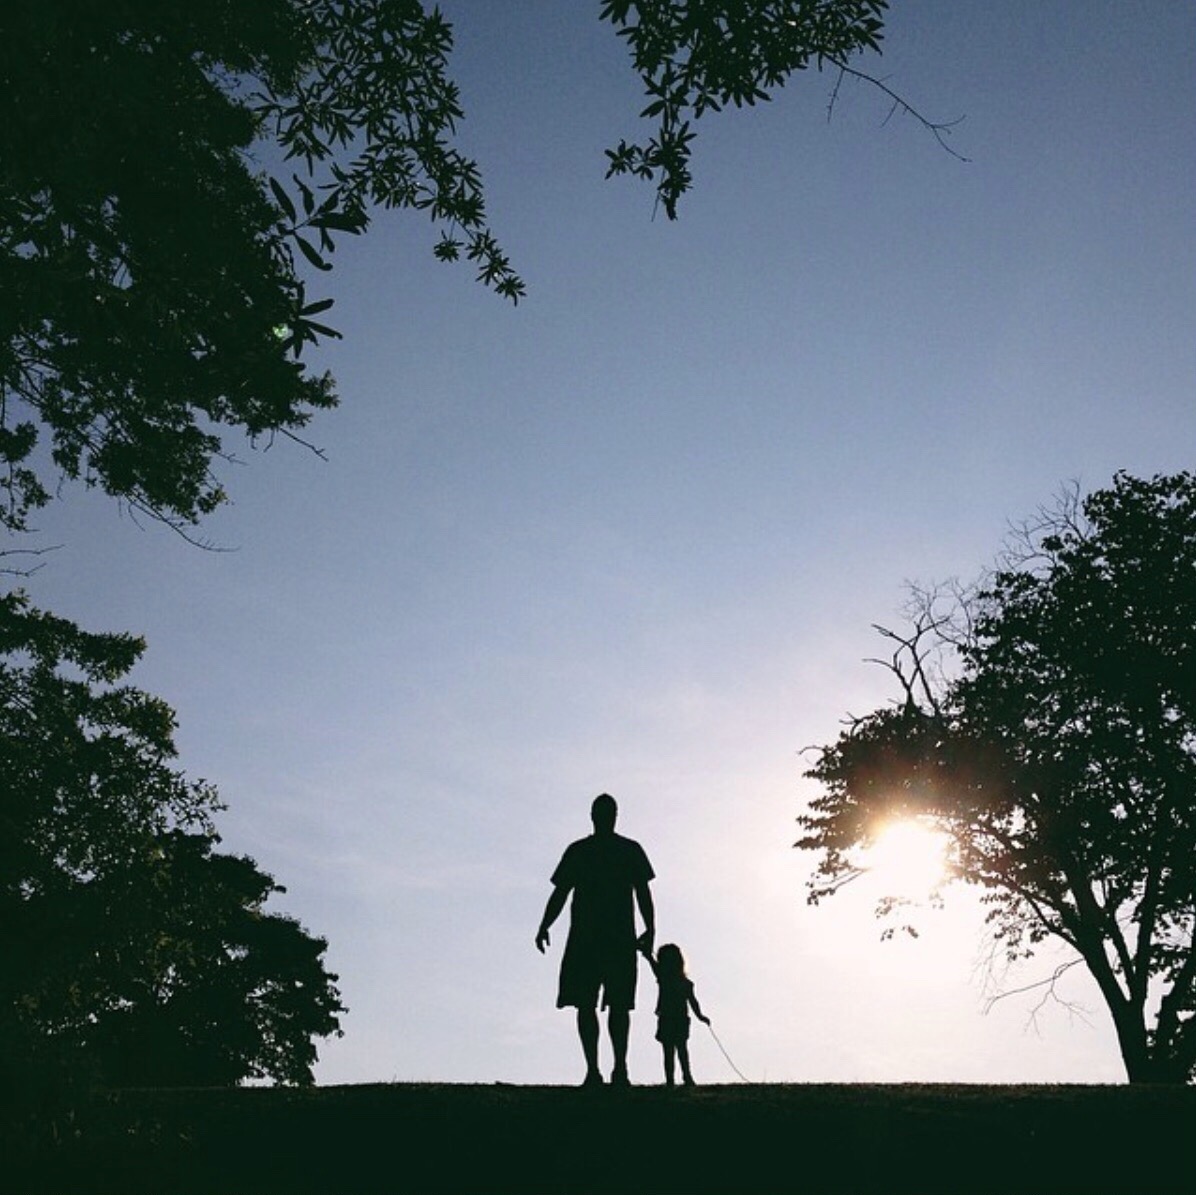
- During partial sun times of the day and golden hour use these tips: face the sun to get that soft lighting look (more towards golden hour); backlight your subjects to create an illuminated and warm glow effect; find a hill and make a silhouette of your sweet loved ones!
- To create sun flare pay attention to the light during golden hour. Control your flare by hiding it behind objects like trees; use flare to add drama to an image and highlight your subject!
HOMEWORK
- Practice shooting in full sun! Post one photo using shade and one photo in full out sun!
- Practice shooting in partial sun and golden hour! Post your best photos having either your subject face the sun; using backlighting; or playing with sun flare!
BONUS MINI LESSON
Silhouettes
Shooting silhouettes can be a really fun type of image to shoot. Creating a silhouette isn’t as complicated as it seems. All you need is a strong source of light. Creating silhouettes outdoors can be a fun little project to create, just keep your eye out for a spot where there is a very strong source of lighting. When I first started playing with silhouettes outside I used hills against the sunset. It creates an easy composition, and creates instant outlines of my subjects. You can also try creating silhouettes indoors as well!
Spot the light sources…


Bonus homework:
Try creating silhouettes and post your favorites to the Facebook group!
As always, thanks for being here!


